Easter Sunday Pie

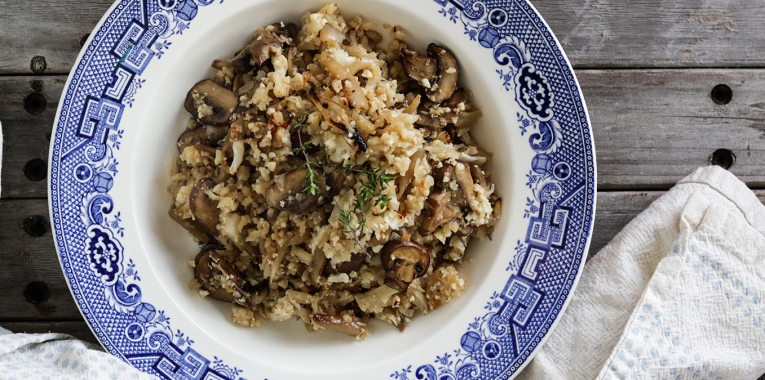
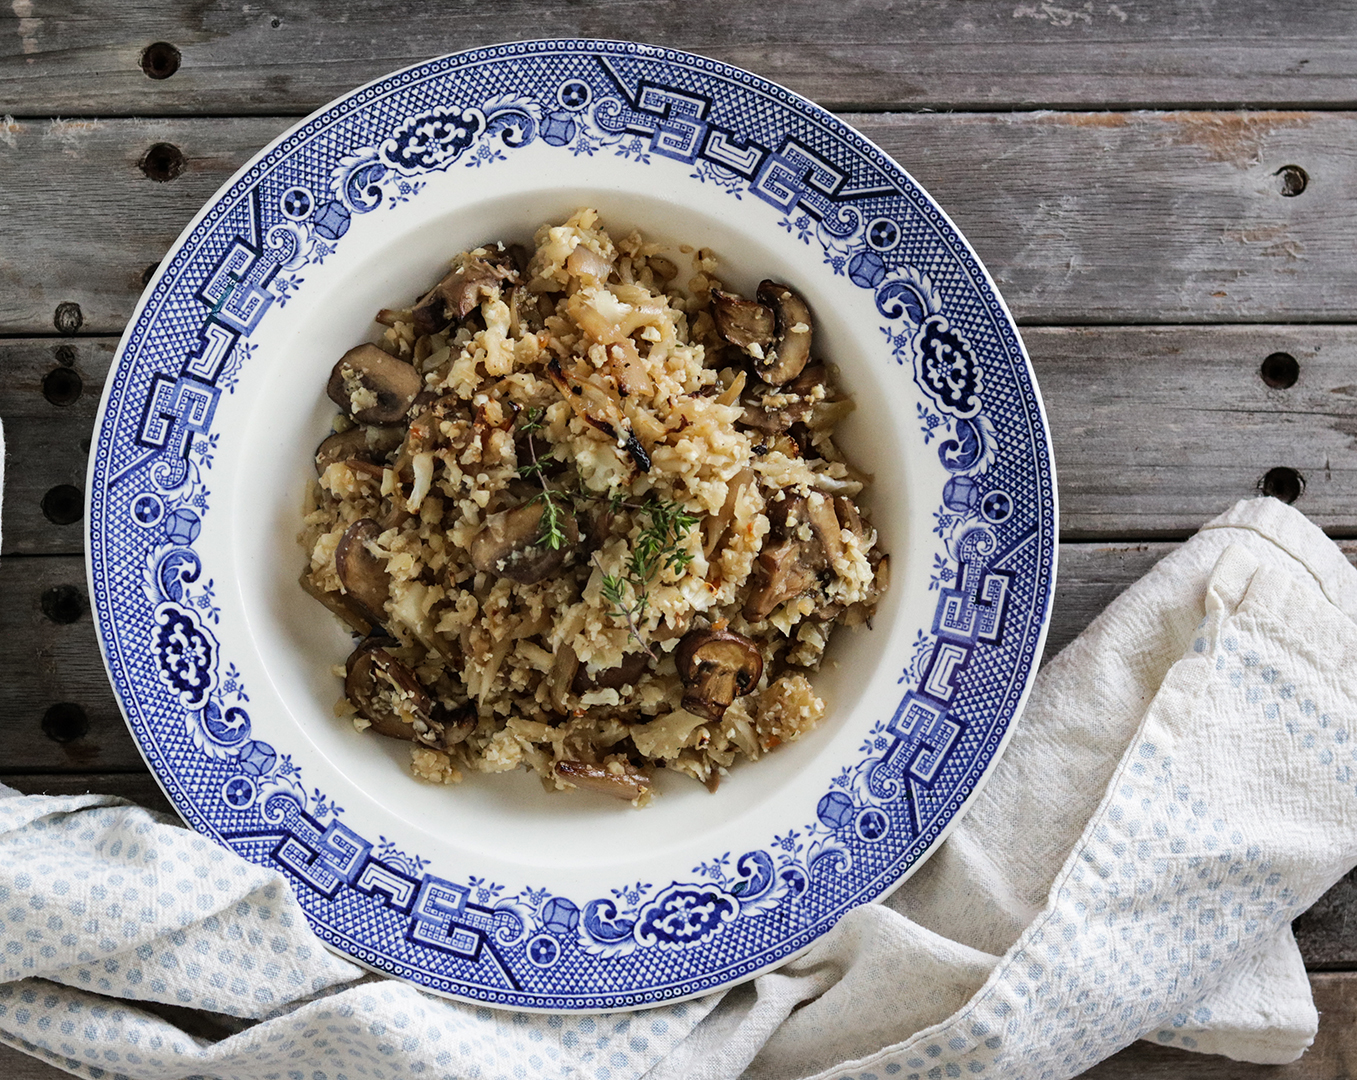
This pie is one of my favourites and it’s a perfect dish for Easter celebrations. The recipe is inspired by my Nan’s famous mince pie where her filling is made from ground beef meat. I’ve substituted the beef for lentils and with the addition of marmite there is no sense of missing out from this vegan pie.

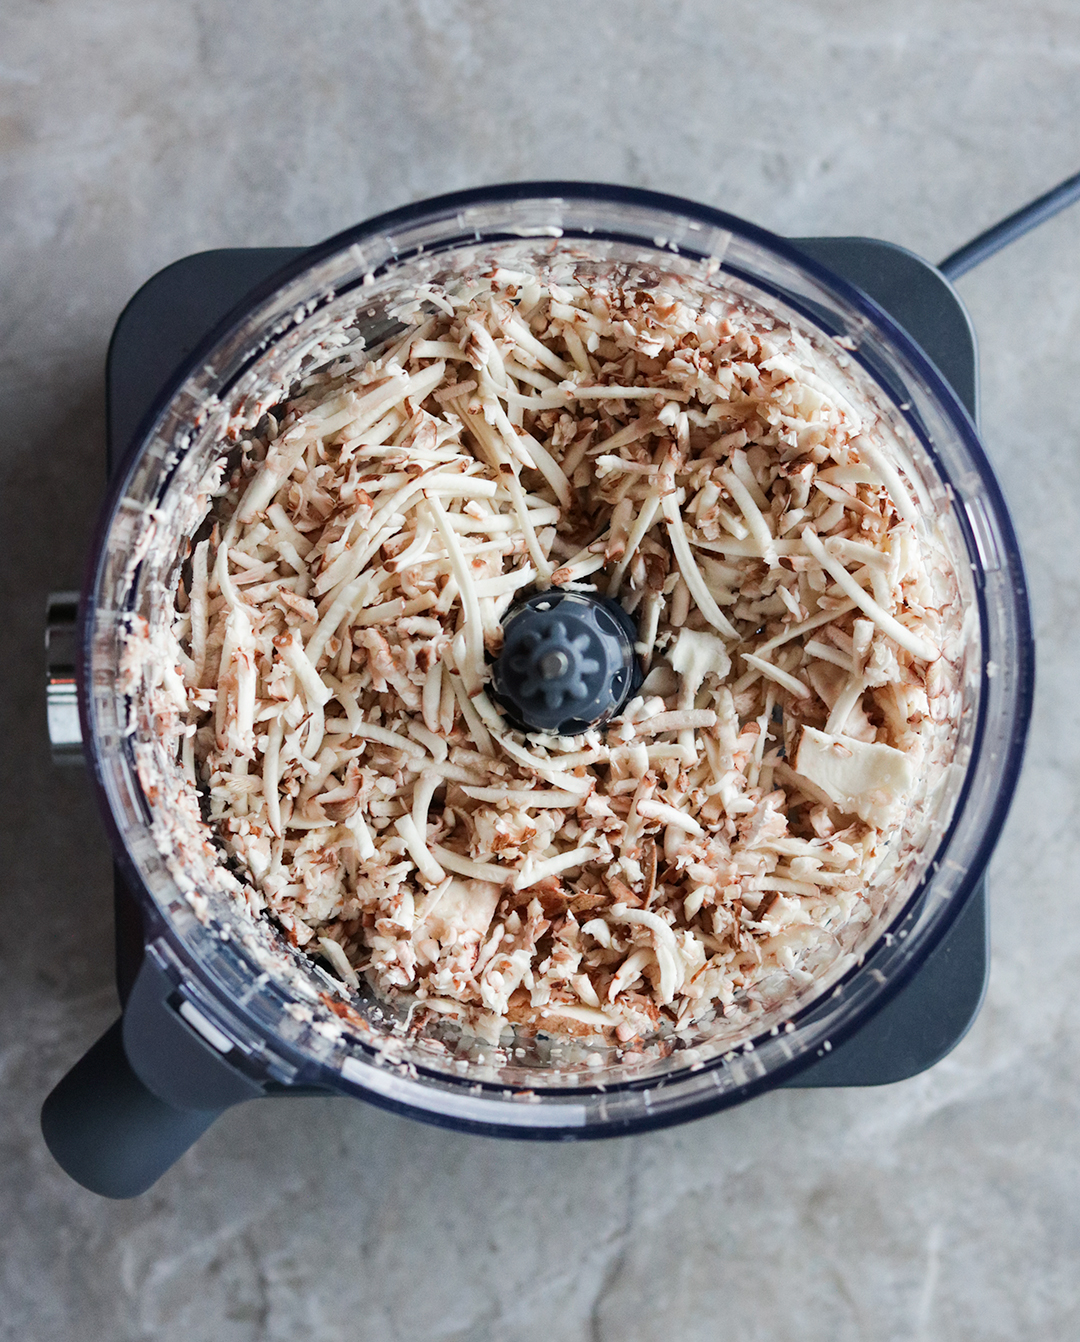
I’ve used my Kenwood Multipro Food Processor to lighten my efforts, it makes the pastry super easy and I can chop the mushrooms in a matter of seconds with the disc blade. I substituted 100g of plain flour for 100g of almond flour which makes the pastry a lot shorter but you can simple use 400g of plain flour if you prefer.

Team this pie up with delicious Mustard Mash for a real Easter treat!

IMG_0395b

What you’ll need for the pastry: Makes two pies

  • 300g plain four
  • 100g ground almonds (optional, you can use plain flour instead)
  • 200g vegan margarine
  • pinch of salt
  • a little water for mixing

What you’ll need for the filling: Makes two pies with a little left over

  • 300g puy lentils, soaked for at least 2 hours, rinsed and drained
  • 2 medium onions, diced
  • 4 large cloves of garlic, finely diced
  • 1 stick of celery, rough bits trimmed and sliced into 1cm pieces
  • 3 medium carrots, washed and diced into 0.5cm cubes
  • 200g chestnut mushrooms, sliced
  • 2 tablespoons of oil
  • 2 teaspoons of marmite
  • 2 Tablespoons of tomato puree
  • 1.5ltr of veg stock
  • A splash of soy sauce
  • A bouquet garni of 1 sprig of rosemary, 3 sprigs of thyme and two bay leaves. If you have some muslin wrap them up in it as the herbs tend to separate in the heat and you don’t want to bite into a sprig of rosemary in your pie.

IMG_0398

Method for the pastry:

  1. Using your multipro food processor fitted with the knife blade, pulse together the flour and the vegan butter. Add a pinch of salt. With the machine running add a tablespoon of water at a time until the pastry comes together.
  2. Tip out onto a dry surface and knead briefly until the pastry has come together nicely. Wrap and leave in the fridge for at least 30 mins.

Method for the pie filling:

  1. Heat one tablespoon of oil in a large pot over a medium heat and add the onions. Cook until translucent before adding the garlic, continue to cook for another few minutes. Add the carrots and celery and continue to cook, stirring occasionally.
  2. Attached the thick slicing disk blade to your Kenwood Multipro Sense Food Processor and slice the mushrooms.
  3. In a separate pan or skillet add the remaining oil and heat over a medium heat before adding the mushrooms. Cook until all the moisture has evaporated.
  4. Add the mushroom mix to the other pot followed by the lentils, stir well. Add the stock, herbs, tomato puree and marmite and cook until lentils are tender but not soft, approx 30 to 40 minutes.
  5. To make the pie, preheat the oven to 180°C and lightly flour a clean surface. Remove the pastry from the fridge and divide into 4 pieces; 2 tops and 2 bottoms. Roll out each piece, rotating each time you roll to ensure a round shape. You want your pastry to be about 0.5cm thick.
  6. Grease the inside of a shallow pie tin with some vegan margarine. Roll one piece of pastry around your rolling pin and lift above the tray. Unroll the pastry onto the tray. Gently lift and drop the pastry into the corners and press it in, careful not to tear the pastry.
  7. When the lentil mix has cooled a little spoon it into the pie tray. Repeat the same process with the lid and seal the edges by pinching the top and bottom layers together. Trim the edges with a sharp knife.

Share and enjoy!

If you try this dish at home please take a photo of it and tag @thetinyvegankitchen on Instagram or@thetinyVK on Twitter I’d love to see them xTx

Ultimate Vegan Chilli

Trying to think of a word to describe this chilli and luxurious comes to mind. Granted, there are quite a few ingredients, a couple that are optional, but it is still super easy to make and I guarantee everyone will enjoy it. I’ve used my Kenwood Multipro Sense food processor fitted with the thick grate blade to produce mushroom mince. This mince is a staple in a lot of my recipes and it adds flavour but also a real meatiness and bite. I’ve also added lentils for the same reason and I’ve added roasted red peppers that really set this dish off. You can of course keep it more traditional with just the beans but I think you’ll be glad of the extra punch created by these additional ingredients.

This recipe makes a large pot that serves 6 to 8 people but I like to let it cool and separate it into portions for the freezer.

IMG_9324 copy

What you’ll need: (serves 6-8):

  • 1 large onion, diced
  • 400g chestnut mushrooms
  • 2 roasted red peppers chopped, from a jar is fine or click here for how to roast yourself
  • 4 cloves of garlic, grated
  • 1 stick of celery, stringy bits removed and cut into 1cm pieces
  • 1 tsp smoked paprika
  • 1 tsp cumin
  • 1 tsp ground corriander
  • 1/2 – 1 tsp chilli powder (depends on how hot you like it)
  • 1 tin of chopped tomatoes
  • 500g of passata
  • 2 tins of kidney beans, rinsed and drained
  • 1 tin of lentils, rinsed and drained
  • 500g of sweet potatoes, peeled and cut into bite sized chunks
  • a small bunch of fresh corriander
  • oil for roasted and frying

IMG_9376

mushroommince


Method:

  1. Preheat the oven to 180°C, place just over 1 tablespoon of oil in a baking tray. Add the sweet potatoes to the tray and toss them in the oil. Place them in the oven and bake for about 25 minutes or until soft.
  2. Meanwhile add the thick cut grating blade to your Kenwood Multipro Sense food processor and grate the mushrooms to create the mushroom meat. Add a little oil to a pan and cook the mushrooms, stirring well.
  3. In a larger pan add about 1 tablespoon of oil and place over a medium heat. Add the onions and cook until translucent before adding the garlic and celery. Cook for a further 3 minutes.
  4. Add all of the dried spices to the onions and stir well. Cook them for about 2 minutes to release the oils and aromatics.
  5. Add the tinned tomatoes first and mix well with the spice mix, when you’re happy that everything has been evenly mixed add the passata and stir through before adding the beans, lentils and red peppers and mushroom mince. Simmer for 20 mins.
  6. When the sweet potatoes are ready add them to the pot.
  7. Served with fragrant rice, some avocado, a wedge of lime and top with some fresh corriander.

Share and enjoy!

If you try this dish at home please take a photo of it and tag @thetinyvegankitchen on Instagram or@thetinyVK on Twitter I’d love to see them.

Tanya x

Oven Roasted Vegan Keto Risotto

This recipe is super easy to make, it’s a one pot wonder so very little cleaning up required. It is also vegan, keto, low cal and low carb and most of all it is packed with delicious flavours. Inspired by a Hugh Fearnley Whittingstal recipe, I’ve made it my own and have swapped out rice for cauliflower. Light as this meal may be it is wholesome so you’ll be left satisfied. The recipe serves 4 but it will last in the fridge for up to three days so it is just as tasty when reheated on a hot pan and have all to yourself.

IMG_0340

I used my Kenwood Food Processor to slice the mushrooms and create the cauliflower rice. My Kenwood machine makes light of these tasks and is the most used machine in my kitchen.

IMG_0318

IMG_0320

What you’ll need: (serves 4)

  • 5 large banana shallots or 300g
  • 2Tbls sunflower oil
  • 3 to 4 sprigs of thyme, leaves only
  • 400g chestnut mushrooms
  • 600g cauliflower, cut into medium sized florets
  • 3 cloves of garlic, grated
  • 1Tbls balsamic vinegar
  • 350ml of veg stock
  • Salt and pepper to taste

IMG_0314

IMG_0323

Method:

  1. Preheat the oven to 180°C. Top and tail the shallots and cut into quarters, length ways. Then cut across the segments into halves, giving you 8 pieces. Add the oil to an oven tray followed by the shallot pieces and toss them well making sure they are coated in the oil. Season with salt and pepper and place the tray in the oven and bake for 30 minutes, turning once or twice.
  2. Attach the thick slice blade to your Kenwood food processor, the lid and place the mushrooms into the funnel on their side. Switch to number 1 to slice mushrooms. Repeat until all of the mushrooms have been sliced. Set aside.
  3. Once the mushrooms have been removed from the processor flip the blade to reveal the thick grater blade. Fill the funnel with cauliflower florets and turn to number 1 to grate the cauliflower. Repeat until all of the cauliflower has been grated. This creates a rice-like texture. Set aside.
  4. After 30 minutes remove the baking tray with the shallots from the oven, add the garlic, balsamic vinegar and mushrooms. Toss well making sure to coat the mushrooms in all of the juices from the tray. Return to the oven for 15 minutes, turning once.
  5. Once the mushrooms have cooked remove the tray from the oven again. Add the cauliflower rice to the tray and stir very well, coating it in all of the delicious flavours from the tray. At this stage the onions and mushrooms will have caramelised so the tray will be packed with flavour. Add the stock and stir again. Return to the oven and cook for about 15 minutes, until the cauliflower has softened and browned a little.

IMG_0339-2


Share and enjoy!

If you try this dish at home please take a photo of it and tag @thetinyvegankitchen on Instagram or@thetinyVK on Twitter I’d love to see them.

Tanya x


Creamy Mushroom and Thyme Sauce

It was Mother’s day this past weekend and my family came to my home to celebrate it. I had intended making this sauce with some pasta but when I mentioned it to my mam she said “oh great” with a slight look of disappointment. You see I later learned that she doesn’t consider pasta to be a “dinner”, these are her exact words. In Ireland a traditional dinner is meat with two veg, one of which is usually potato. Although I’d be happy to eat pasta every day of the week I do understand where she’s coming from; on a cold day or if I’m really hungry and tired I crave that type of Irish dinner, without the meat part obvs.

I had some vol au vants in the freezer so I thought I’d use the creamy sauce as a filling for these. It worked perfectly! I served them with creamy mustard mash (you’ll get the recipe here ) and steamed broccoli. Everyone had thoroughly enjoyed the meal and had seconds. I was a very happy host!

burgenion

What you’ll need: (serves 4 to 6)

  • 1 cup of cashew nuts, soaked for at least 2 hours
  • 2 cloves of garlic, grated
  • 1 onion, finely diced
  • 400g chestnut mushrooms, sliced
  • 1 level tablespoon of thyme leaves
  • Salt and pepper to season
  • 500ml of low salt stock

burgenion-2b

Method:

  1. Rinse and drain the cashews, add to a blender and pulse. Add 1 cup of water and mix on a high speed until smooth and creamy. Set aside. Note** more liquid (stock) will need to be added later on.
  2. Heat a large and a medium pan over medium heat. Add a little oil to both and when hot enough add the mushrooms to the large pan and the onion to the smaller one. You’ll need to cook the mushrooms in 2 or 3 batches.
  3. When the onion is almost translucent add the garlic and cook through for a few more minutes. Add half the cashew cream mix and a cup of stock. Stir well and add more stock, half a cup at a time, until you get the consistency you’re happy with. Add the thyme.
  4. As the mushrooms are cooked add them to the pan with the cream mix. When all is done allow the mix to cook for a couple of minutes, season well with salt and pepper, share and enjoy!!


Share and enjoy!

If you try this dish at home please take a photo of it and tag @thetinyvegankitchen on Instagram or@thetinyVK on Twitter I’d love to see them.

Tanya x

Thick and Creamy Roasted Cauliflower Soup

Roasting cauliflower is a game changer. Something magical happens when you add a little oil and some spices and roast this baby, something so good that the only time I have cauliflower steamed now is at my folk’s house. The nuttiness and bite from it is truly mind blowing and I love saving some little florets to top the soup with, they’re such a treat. There is little or no effort involved in making this warming soup and it freezes well too.

cauli-soup-2

What you’ll need: (serves 4)

  • 600g cauliflower florets
  • 4 cloves of garlic, skin on
  • 1 medium white onion, finely diced
  • 2 tablespoons of coconut oil
  • 400ml vegetable stock
  • 1 can of coconut milk
  • 1 teaspoon of turmeric
  • 1 teaspoon of cumin
  • Salt to taste

cauli-soup-b2

Method:

  1. Preheat the oven to 200°c. make a little pouch with some tin foil and place the garlic cloves inside, covering it well but leaving air to circulate inside. Put the pouch on the top shelf of the oven and roast for about 30 minutes or until the garlic is soft inside it’s skin.
  2. Add the coconut oil to a baking tray and place in the oven until it has melted. Remove from the oven and add the cauliflower florets, tossing them gently to make sure they’re all well coated in the oil. Sprinkle over the spices and roast for about 30 minutes until the cauliflower is a golden brown colour.
  3. Meanwhile heat a little oil in a large pot and add the onion. Gently cook until translucent. Add the coconut milk and stir. When the cauliflower and garlic is ready squeeze the garlic from it’s skin and into the pot, add the cauliflower florets, keeping some florets for decoration. Stir well.
  4. Use a hand blender or a food processor to blend to a rich, smooth soup. Season to taste and serve up topped with the remaining florets.

Share and enjoy!

If you try this dish at home please take a photo of it and tag @thetinyvegankitchen on Instagram or@thetinyVK on Twitter I’d love to see them.

Tanya x


Savoury Chickpea Sandwich

Sandwiches are the handiest thing sometimes to bring with you when you know you’ll be out for a while and there may not be too many vegan options for you. Coming up with vegan sandwich fillings is something that I struggle with a little. I want something that’s quick and easy and tastes good. Wraps are great but sometimes I just want to sink my teeth into an actual sandwich, great tasting filling inside two slices of delicious bread. This one is a winner and you can just double the ingredients for extra sandwiches.

chickpea-sambo-4c


What you’ll need: (serves 2)

  • 1/2 can of chickpeas, rinsed and drained
  • 1/2 and avocado
  • 1 tablespoon of lemon juice
  • 1/4 red onion, very finely diced
  • Salt to taste

Method:

  1.  Simple mash all of the ingredients together in a bowl and build your sandwich with some greens and whatever other fillings you like. Simples!

Share and enjoy!

If you try this dish at home please take a photo of it and tag @thetinyvegankitchen on Instagram or@thetinyVK on Twitter I’d love to see them.

Tanya x

Italian Meatballs With A Tomato And Basil Sauce

These bad boys really pack a flavour punch, perfect with pasta or on their own with some salad. They’re also super tasty served cold and would make a great lunch box snack for the little ones. They hold their shape well so there’s no messing around and they cook easily. This recipe makes about 24 completely vegan meatballs that even your omni friends would be delighted to try and will come back for more. Make a batch at the weekend and separate into portions for the freezer, you’ll be chuffed to come home to this easy to prepare meal after a busy day. Oh! They’re also super healthy too and if you’re gluten-free just swap out the regular oats for gluten free oats. Serve with a sauce of your choice but I love them with my tomato and basil sauce, they’re a perfect combo.

meatballs

What you’ll need for the meatballs: (makes 24)

  • 1 large white onion, finely diced
  • 4 cloves of garlic, grated
  • 400g chestnut mushrooms, cleaned with a damp cloth and sliced
  • 400g tin of black beans, rinsed and drained
  • 1 and 1/2 cups of porridge oats
  • 2 tablespoons of tomato puree
  • 2 tablespoons of ground flax seeds
  • 1 tablespoon of vegan worcestershire sauce
  • 2 teaspoons of smoked paprika
  • 1 teaspoon of hot paprika
  • 1/4 cup of basil
  • 1/2 teaspoon of salt
  • 2 tablespoons of oil and a little extra for cooking

meatballs-2

What you’ll need for the tomato and basil sauce:

  • Tin of chopped tomatoes (400g)
  • One onion, finely diced
  • About a handful of basil (1/3 of a shop bought plant)
  • Some Olive Oil for frying
  • Some sugar (optional)

meatballs-6

Method for the meatballs:

  1. Add 1 tablespoon of oil to a large pan and place over a medium heat, add the onions and cook until translucent, remove and set aside. Add another tablespoon of oil to the pan and add the mushrooms. When they are almost done add the garlic and continue to cook for another 3 minutes.
  2. Meanwhile place the porridge oats into a food processor and whizz until you have a flour that’s as smooth as possible. Remove from the food processor and place in a bowl, add the beans and the other ingredients, including the onion and the mushrooms and mix well. If you have a very large food processor you can just add everything to it but mine is medium-sized and the mix is a little too big for it.
  3. In separate batches of about 2 to 3 add the mix back into the food processor and blend until smooth, combine the batches all together in the bowl.
  4. Using a tablespoon as a measure scoop up some of the mix and form into balls, you should get about 24. Refrigerate for 30 minutes.
  5. Add a little oil to a pan and place the pan over a medium heat, add the meatballs and cook gently until they are warm all the way through and are browned nicely on the outside.
  6. Add the sauce to the pan and serve with pasta or how you like.

meatballs-3b

Method for the tomato and basil sauce: 

  1. Add a little oil to a large pan and gently heat over a low flame. Add the onions and cook until they become translucent. Add the tinned tomatoes and give it a good stir. Chop your basil and add to the pot. Have a little taste and add some sugar if needed. Simmer on a low heat until the sauce becomes a beautiful, deep orange colour (approx 20mins). Using a hand blender give the sauce a good whizz until smooth (the large pan comes in handy here as it can get a tad messy). And that’s it! Yum! You can use straight away or freeze.

Share and enjoy!

If you try this dish at home please take a photo of it and tag @thetinyvegankitchen on Instagram or@thetinyVK on Twitter I’d love to see them.

Tanya x

Roasted Squash with a Lemony Quinoa Salad

Always having some cooked quinoa in the fridge makes for tasty and quick midweek meals, especially during the summer time. We’ve been so blessed in Ireland this year with lots of sunshine, however as I write this the air is cool, they sky is grey and its spitting rain every few minutes. Things are returning to normal but I feel most people are welcoming a day or two of cooler weather, we’re just not cut out for months of sunshine in Ireland, it knocks us off-balance hehe.

This recipe is perfect for one of those hot days, the butternut squash makes it more wholesome and gives it bite and the toasted almonds add a crunchy texture. Leaving the skin on the squash saves time and if you haven’t already tried it then you must, the skin caramelises and becomes a little chewy, it’s a delight.

bns-and-quinoa-salad

What you’ll need: (serves 2):

  • 1 cup of quinoa
  • 2 cups of good quality vegetable stock
  • 2 cloves of garlic, grated
  • pinch of salt
  • 1 baby butternut squash or half a regular squash
  • 2 tablespoons of oil
  • Juice of half a lemon
  • 4 spring onions, white and green parts sliced
  • 1/4 cup of pomegranate seeds
  • small bunch of chopped parsley
  • 1/4 cup of flaked almonds

Method:

  1. Preheat the oven to 200°C, place the squash in an oven dish and pour over a little oil making sure each piece is well coated. Place the tray into the oven and cook for about 30 minutes or until the squash is cooked through and it’s skin is golden brown.
  2. Always check the packet instructions for cooking the quinoa. Rinse and drain the quinoa, place in a pot with the grated garlic and cover with the stock. Cook on a gentle heat until ready.
  3. Place a non-stick pan over a medium heat and add the flaked almonds. Gently toast until lightly golden, remove from the pan and set aside and allow to cool fully.
  4. Place the quinoa in a large bowl and fluff up with a fork, add the spring onions, salt, pomegranate seeds, parsley and drizzle over the lemon juice.
  5. Separate into two plates and serve with the butternut squash. Scatter over the flaked almonds and servebns-and-quinoa-salad-2

Share and enjoy!

If you try this dish at home please take a photo of it and tag @thetinyvegankitchen on Instagram or@thetinyVK on Twitter I’d love to see them.

Tanya x

Roasted Cherry Tomato and Garlic Cashew Cream Sauce

You may like to use this sauce just for pasta but it makes a great dipping sauce and salad dressing too, just add a little more water to loosen up the consistency. This sauce keeps in the fridge for 3 to 4 days and freezes well too…it never makes it to the freezer though as its gobbled up far too quickly. The sweet flavour from the tomatoes and the cheesy back notes from some nutritional yeast make this my current go-to pasta sauce and it takes so little time to make. I think you’ll enjoy this one.

pasta-sauce

What you’ll need: (serves 4)

  • 150g Cherry Tomatoes
  • 1 1/2 tablespoons of oil (I used sunflower)
  • 1 onion, finely diced
  • 6 cloves of garlic
  • 1/2 cup of cashews, soaked overnight
  • 1/4 cup of fresh basil leaves
  • 1 tablespoon of Nutritional Yeast
  • A pinch of salt to taste
  • 2 cups of water

pasta-sauce-4

Method:

  1. Preheat the oven to 180°. Cut the tops off the garlic cloves and place them in some foil, and drizzle with a little oil. Bring the foil up around them creating a little pouch where air can circulate inside. Cook in the oven for about 30mins or until soft. Remove and allow to cool.
  2. Place the tomatoes in a baking tray and cover in some of the oil, gently move them around to coat them evenly with the oil. Bake for about 30 minutes, they should be a little golden on the outside but not black.
  3. While the garlic and tomatoes are roasting heat the rest of the oil over a medium heat and add the onions, sauté until translucent.
  4. When the garlic is cooked and cool enough to touch, squeeze each clove into a food processor and add the tomatoes and onions, basil, cashews and nutritional yeast. Add one cup of water and pulse. Slowly add some of the second cup a little at a time until you reach your preferred consistency. Add salt to taste.
  5. Cook the pasta to the packet instructions and strain when the pasta is still al dente keeping one cup of the pasta water. Place a pan over a medium heat on the hob and add the desired amount of sauce followed by the pasta. Heat through and add a little of the saved pasta water at a time to the pan to loosen the sauce to your desired consistency. Once the pasta is cooked season to taste.

Share and enjoy!

If you try this dish at home please take a photo of it and tag @thetinyvegankitchen on Instagram or@thetinyVK on Twitter I’d love to see them.

Tanya x

Roasted Red Pepper and Tomato Soup

After the longest and harshest winter ever summer finally arrive in May and we’ve been blessed with temperatures of up to 23°. If you’ve ever been to Ireland you might have noticed that we like to talk a lot about the weather, you see we get so much bad weather that once the sunshine appears it’s all anyone is concerned with.

No matter what time of the year it is I like to enjoy a tasty bowl of soup but the warmer months call for a soup that’s lighter, sweeter and echoes that happy summer feeling. This soup does just that and it’s a perfect lunch for a warm, sunny afternoon. With only 6 ingredients its super easy to prepare.

red-pepper-soup-4

What you’ll need: (serves 4)

  • 2 red peppers
  • 2 can of chopped tomatoes
  • 2 onion, finely diced
  • Maple syrup to taste (optional)
  • 2 tablespoons of coconut oil
  • Sprig of thyme

red-pepper-soup-2

Method:

  1. Preheat your oven to 180°C, add 1 tablespoon of the oil to a roasting dish and heat in the oven for a few minutes. Prepare the peppers by cutting length ways into each one to get 4 to 6 pieces. Discard the centre and cut away any of the white pith. When the oil is hot enough remove the tray and add the red peppers skin side down. Keep an eye on them and turn once the skin has started to blacken and blister slightly. They’ll take about 30mins to cook.
  2. Meanwhile, heat the remaining oil in a large pan and add the onion. Cook over a medium heat until translucent.
  3. Add the tomatoes and cook for about 30mins until the tomatoes turn to a more orange colour. Chop up the roasted peppers and add to the mix. With a hand blender or a food processor blend to a silky smooth finish.
  4. Season to taste and add a drop of maple syrup to sweeten if you think it needs it.
  5. Top with some fresh thyme.

Share and enjoy!

If you try this dish at home please take a photo of it and tag @thetinyvegankitchen on Instagram or@thetinyVK on Twitter I’d love to see them xTx